Does a 4K Receiver Improve Picture Quality?
If you recently purchased a new 4K TV but aren’t seeing the ultrasharp image quality you were promised, your outdated AV receiver might be the culprit. Given that 4K receivers can be quite expensive, you might be questioning their value. Does a 4K receiver enhance picture quality?
A 4K receiver does improve picture quality if you’re using a 4K TV. Most 4K receivers have “4K pass-through,” allowing the 4K video signal to reach the TV directly without any processing. However, if your current 4K receiver already has 4K pass-through, a new receiver won’t improve picture quality.

The rest of this article will discuss what a 4K receiver can do for your picture quality on a 4K TV. I’ll explain what 4K pass-through is, compare it to upscaling, and explain whether you should use upscaling on your receiver or TV. I’ll also touch on how a TV receiver affects sound quality.
Also read: Can 4K Be Played on a 1080p TV?
As an affiliate, I may collect a share of sales or other compensation from the links on this page.
Does a 4K Receiver Improve Picture Quality?
A 4K receiver can improve picture quality on 4K TVs compared to older TV receivers. 4K receivers can send a higher quality image to your TV. However, If your current receiver already has 4K pass-through, a newer receiver likely won’t affect picture quality.
If you’re still using an ancient 1080p Full HD receiver with your 4K TV, you’ll get low-resolution content even on 4K TV channels.
Everything will look muddy because it’s downscaled from 4K to 1080p, then upscaled once more to 4K.
The problem vanishes when you use the TV’s built-in smart features to watch YouTube and Netflix.
Moreover, you can’t even watch most 4K content over HDMI and Blu-Ray because of modern copyright protection.
If that’s the case, you’ll benefit greatly from a new 4K receiver.
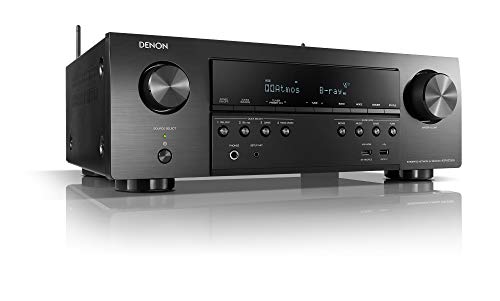
Something like the Denon AVR-S750H Receiver (Amazon.com) is the perfect choice for a high-end home theater experience. This receiver (see image below) has 4K, 7.2 surround sound, Alexa, 3D Dolby Atmos, and every other feature under the sun.
But if your TV receiver already has an HDMI output labeled “4K pass-through,” you won’t get better picture quality by upgrading.
If that’s the case, you should only buy a new receiver if you want additional features like Bluetooth, better surround sound, and built-in voice assistants.
What Is 4K Pass-Through?
4K pass-through is a feature on 4K receivers that allows video to go from the input signal to your TV directly. Most 4K receivers have 4K pass-through nowadays. Some older receivers don’t have 4K pass-through, meaning the video gets processed by the receiver’s built-in chip.
4K pass-through is the most important feature to look for on a new receiver beyond a shadow of a doubt. It lets you get the most out of your new 4K TV by sending unadulterated 4K video playback.
If you want to watch 4K at 120 FPS, you need an HDMI 2.1 pass-through port. Likewise, you need an HDMI 2.0 pass-through for 4K at 60 FPS.
It’s worth noting that a 4K pass-through port should mean the same on all AV receivers. The signal coming from your TV provider goes straight into the TV, no strings attached.
However, some exceptionally low-quality AV receivers have chips that can’t handle the 4K pass-through. So, steer clear from cheap knock-off brands.
4K Pass-Through vs. 4K Upscaling
As explained above, a 4K pass-through signal is an unmodified 4K TV signal. Your receiver doesn’t process it, so you get the true pixel-for-pixel 4K picture broadcasted from the TV channel.
4K upscaling is completely something else. When your TV or AV receiver upscales a picture, it takes a resolution below 4K (usually 1080p) and duplicates the pixels to get to 4K. It’s a useful feature. You can watch lower-resolution content on a sharper screen, and it won’t look too bad.
However, 4K upscaling isn’t anywhere near as good as 4K pass-through. With true 4K video playback, each and every pixel is unique. This results in a significantly sharper and more vibrant image.
So, you should only watch upscaled 4K when 4K pass-through isn’t an option.
Should I Use 4K Upscaling on Receiver or TV?
You should generally use 4K upscaling on your TV, not your receiver. Most 4K TVs have built-in chips that are better at upscaling content from 1080p to 4K than receivers. Even high-quality receivers can’t compare to the basic upscaling technology built into your TV.
Depending on your setup, you could see an enormous difference when switching 4K upscaling to your TV. 4K TVs have excellent upscaling algorithms tailored to the display panel in question.
Virtually all 4K TVs will upscale 1080p or lower-resolution content automatically. If not, you can check in your TV’s user manual or skim through the settings to find the option.
Likewise, 4K receivers often have automatic upscaling technology as well. However, the option isn’t always easy to find.
In most cases, you’ll have to switch the resolution to 1080p in the receiver’s settings. This makes the receiver send out a 1080p signal to your TV, which then gets upscaled to 4K.
However, this also means that your receiver won’t send true 4K via 4K pass-through anymore either. So, it’s an option that you’ll have to enable and disable all the time.
If you don’t see a noticeable difference when watching TV channels upscaled from 1080p, I recommend that you restore the default settings.
Can a New 4K Receiver Improve Sound Quality?
A 4K AV receiver can significantly improve sound quality on your TV, home theater setup, or soundbar. New 4K AV receivers have better built-in amplifiers and better surround sound technology like Dolby Atmos, allowing for a more immersive experience.
In addition to getting better picture quality with a 4K receiver, you’ll get better audio tech as well.
An AV receiver isn’t just a box that delivers video and audio from your TV provider to your screen. It’s also a high-quality amplifier.
If you have a 5.1, 7.1, or any other surround sound setup, you need a good 4K receiver. Look for Dolby Atmos support to get the most out of your Blu-Ray movies and TV shows.
Final Thoughts
A 4K receiver can improve picture quality with a 4K pass-through HDMI port. 4K pass-through sends unmodified 4K video playback to your TV, enabling you to watch true 4K content.
If a TV channel doesn’t have 4K broadcasting, you can use your TV’s built-in 4K upscaling technology to improve image quality. Just make sure to set the receiver to 1080p in that case.
Sources
- Cnet: Do I need a new AV receiver to go with my 4K TV?
- PC Mag: 4K pass-through
- HDMI: HDMI 2.1 Specification Technology Overview
- PC Mag: 4K upscaling
- Reddit: HDMI 1080 to 4K Upscaling – let my receiver or TV do it?
- RTINGS: 4k vs 1080p and Upscaling
- What Hi-Fi: How to set up your AV receiver and get the best sound
- What Hi-Fi: Dolby Atmos: what is it? How can you get it?